

Creating permissions
Users of our app can have the following permissions: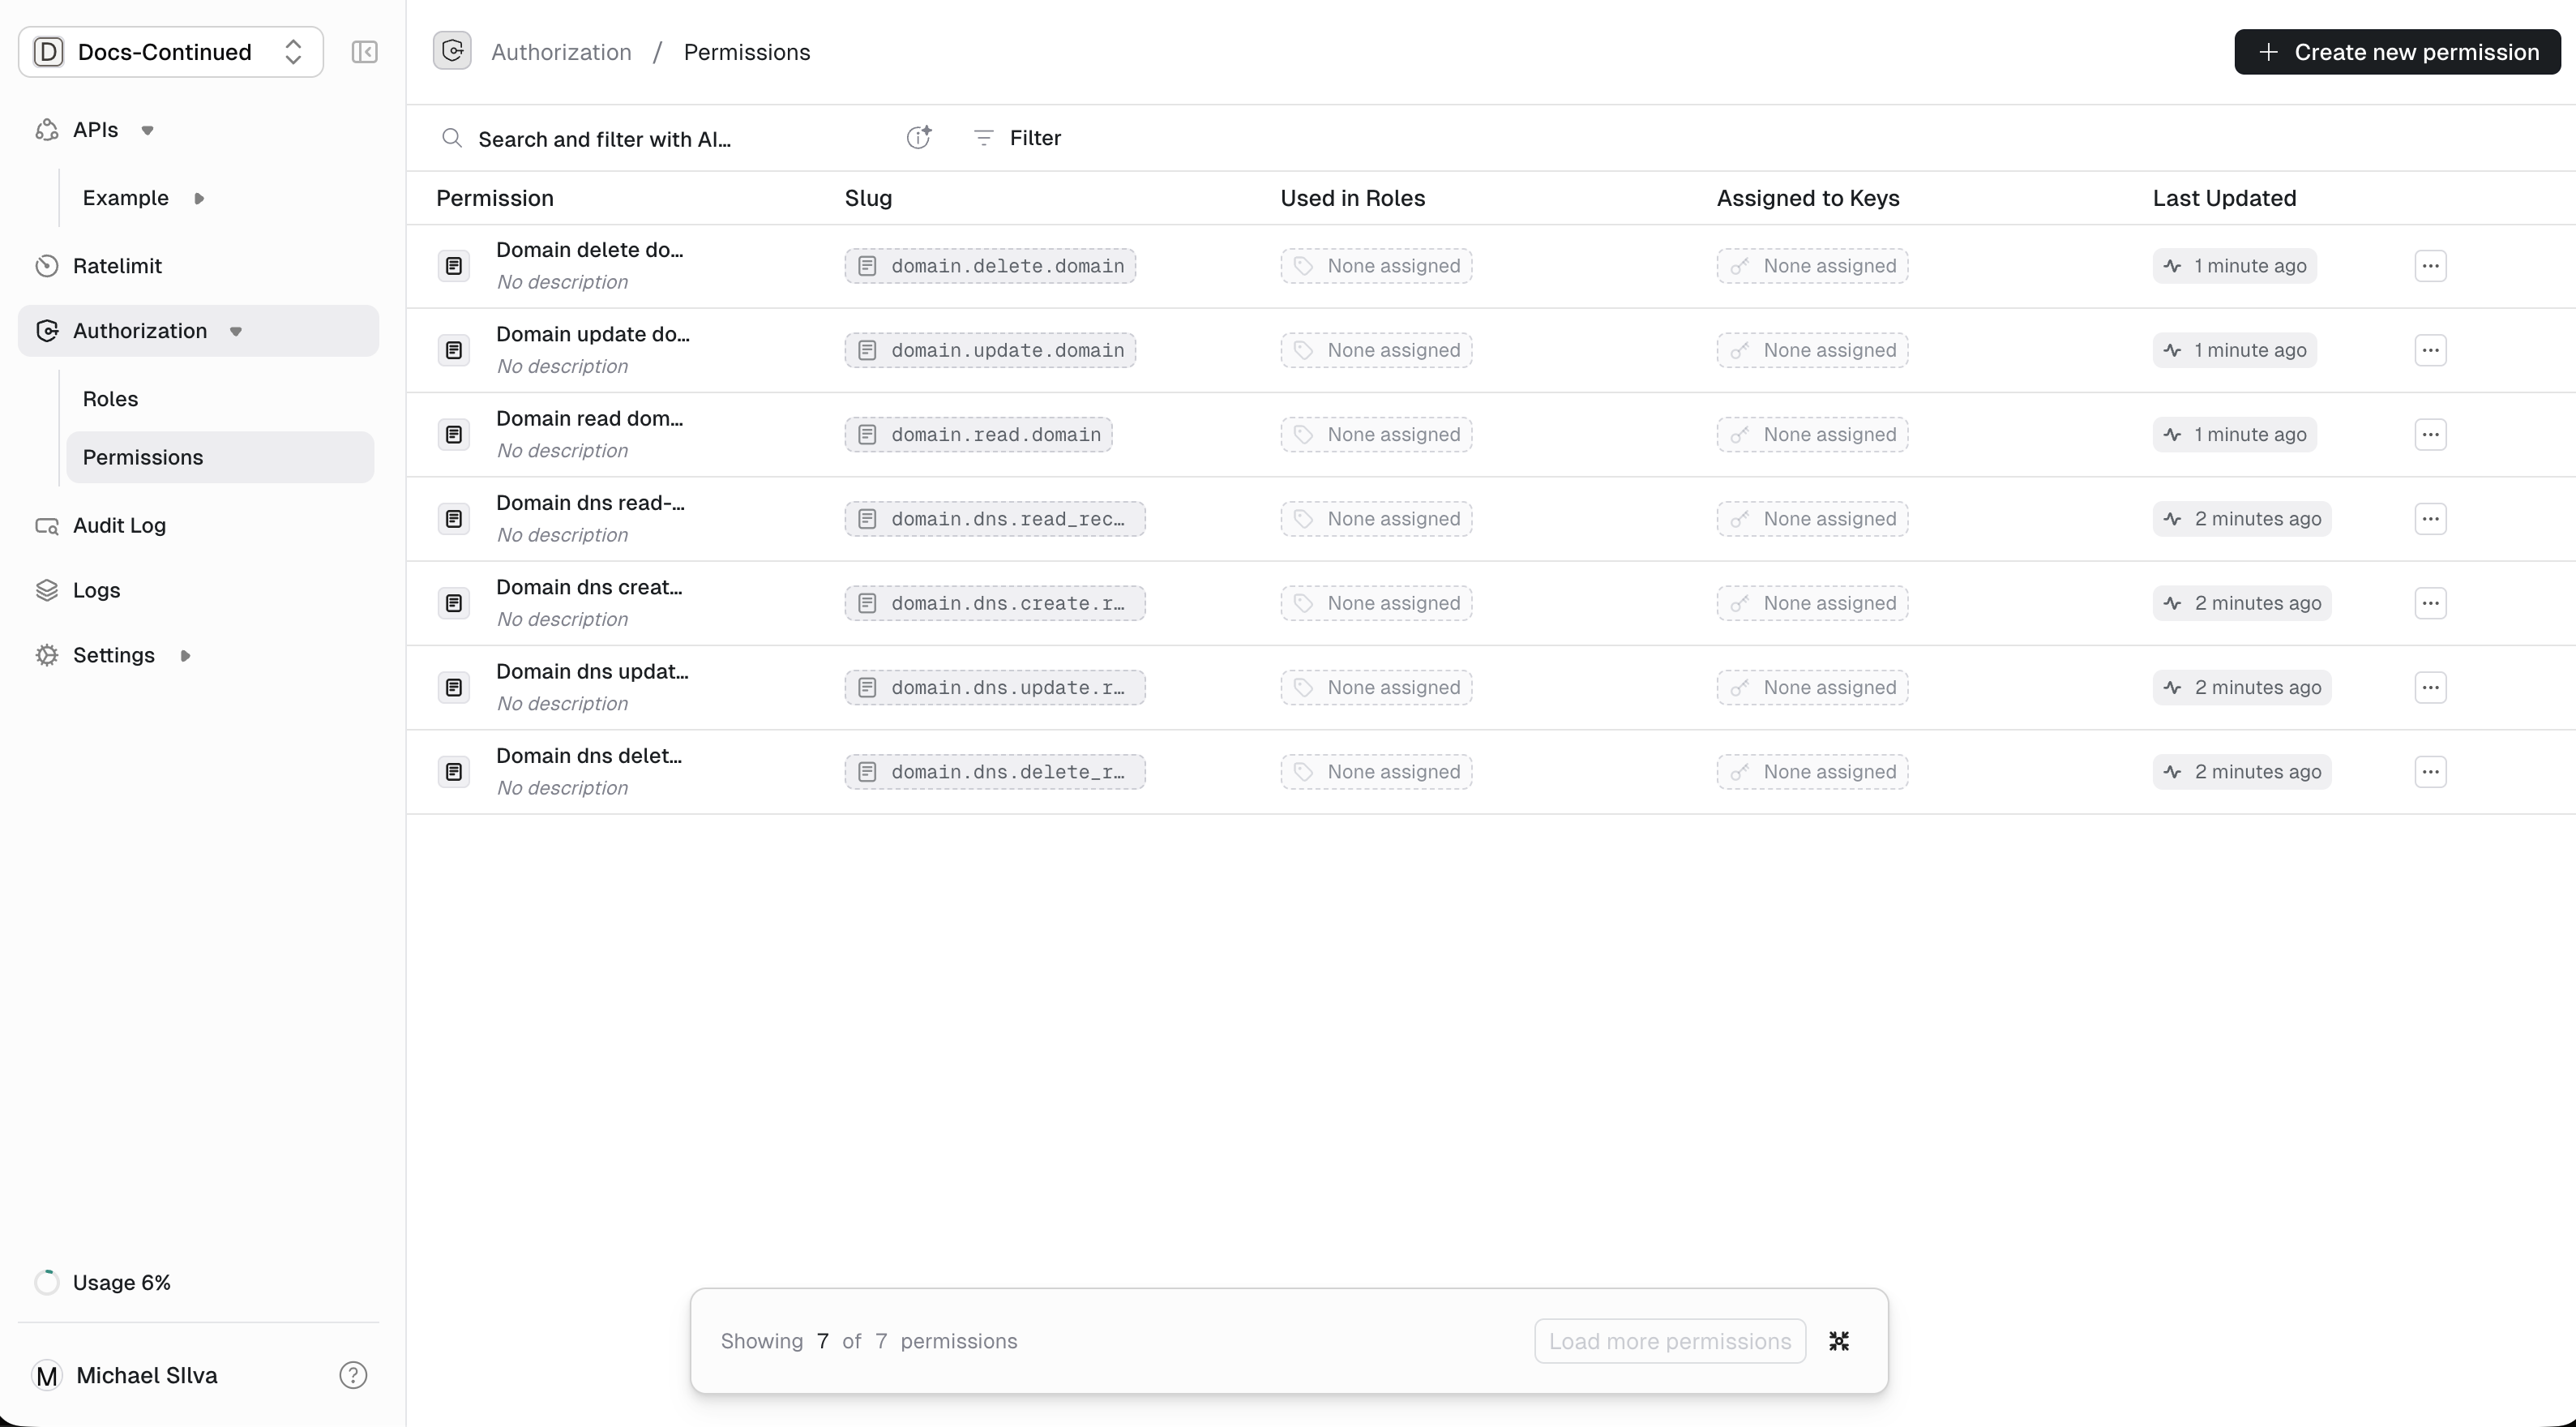
domain.delete_domaindomain.dns.create_recorddomain.dns.read_recorddomain.dns.update_recorddomain.dns.delete_recorddomain.create_domaindomain.read_domaindomain.update_domain
- For
Roles, navigate to theAuthorization/Roles. Default when navigating toAuthorization. - For
Permissions, navigate to theAuthorization/Permissions.
Authorization/Permissions page. Use the button in the upper right. + Create new permissionCreating roles
We define the following roles: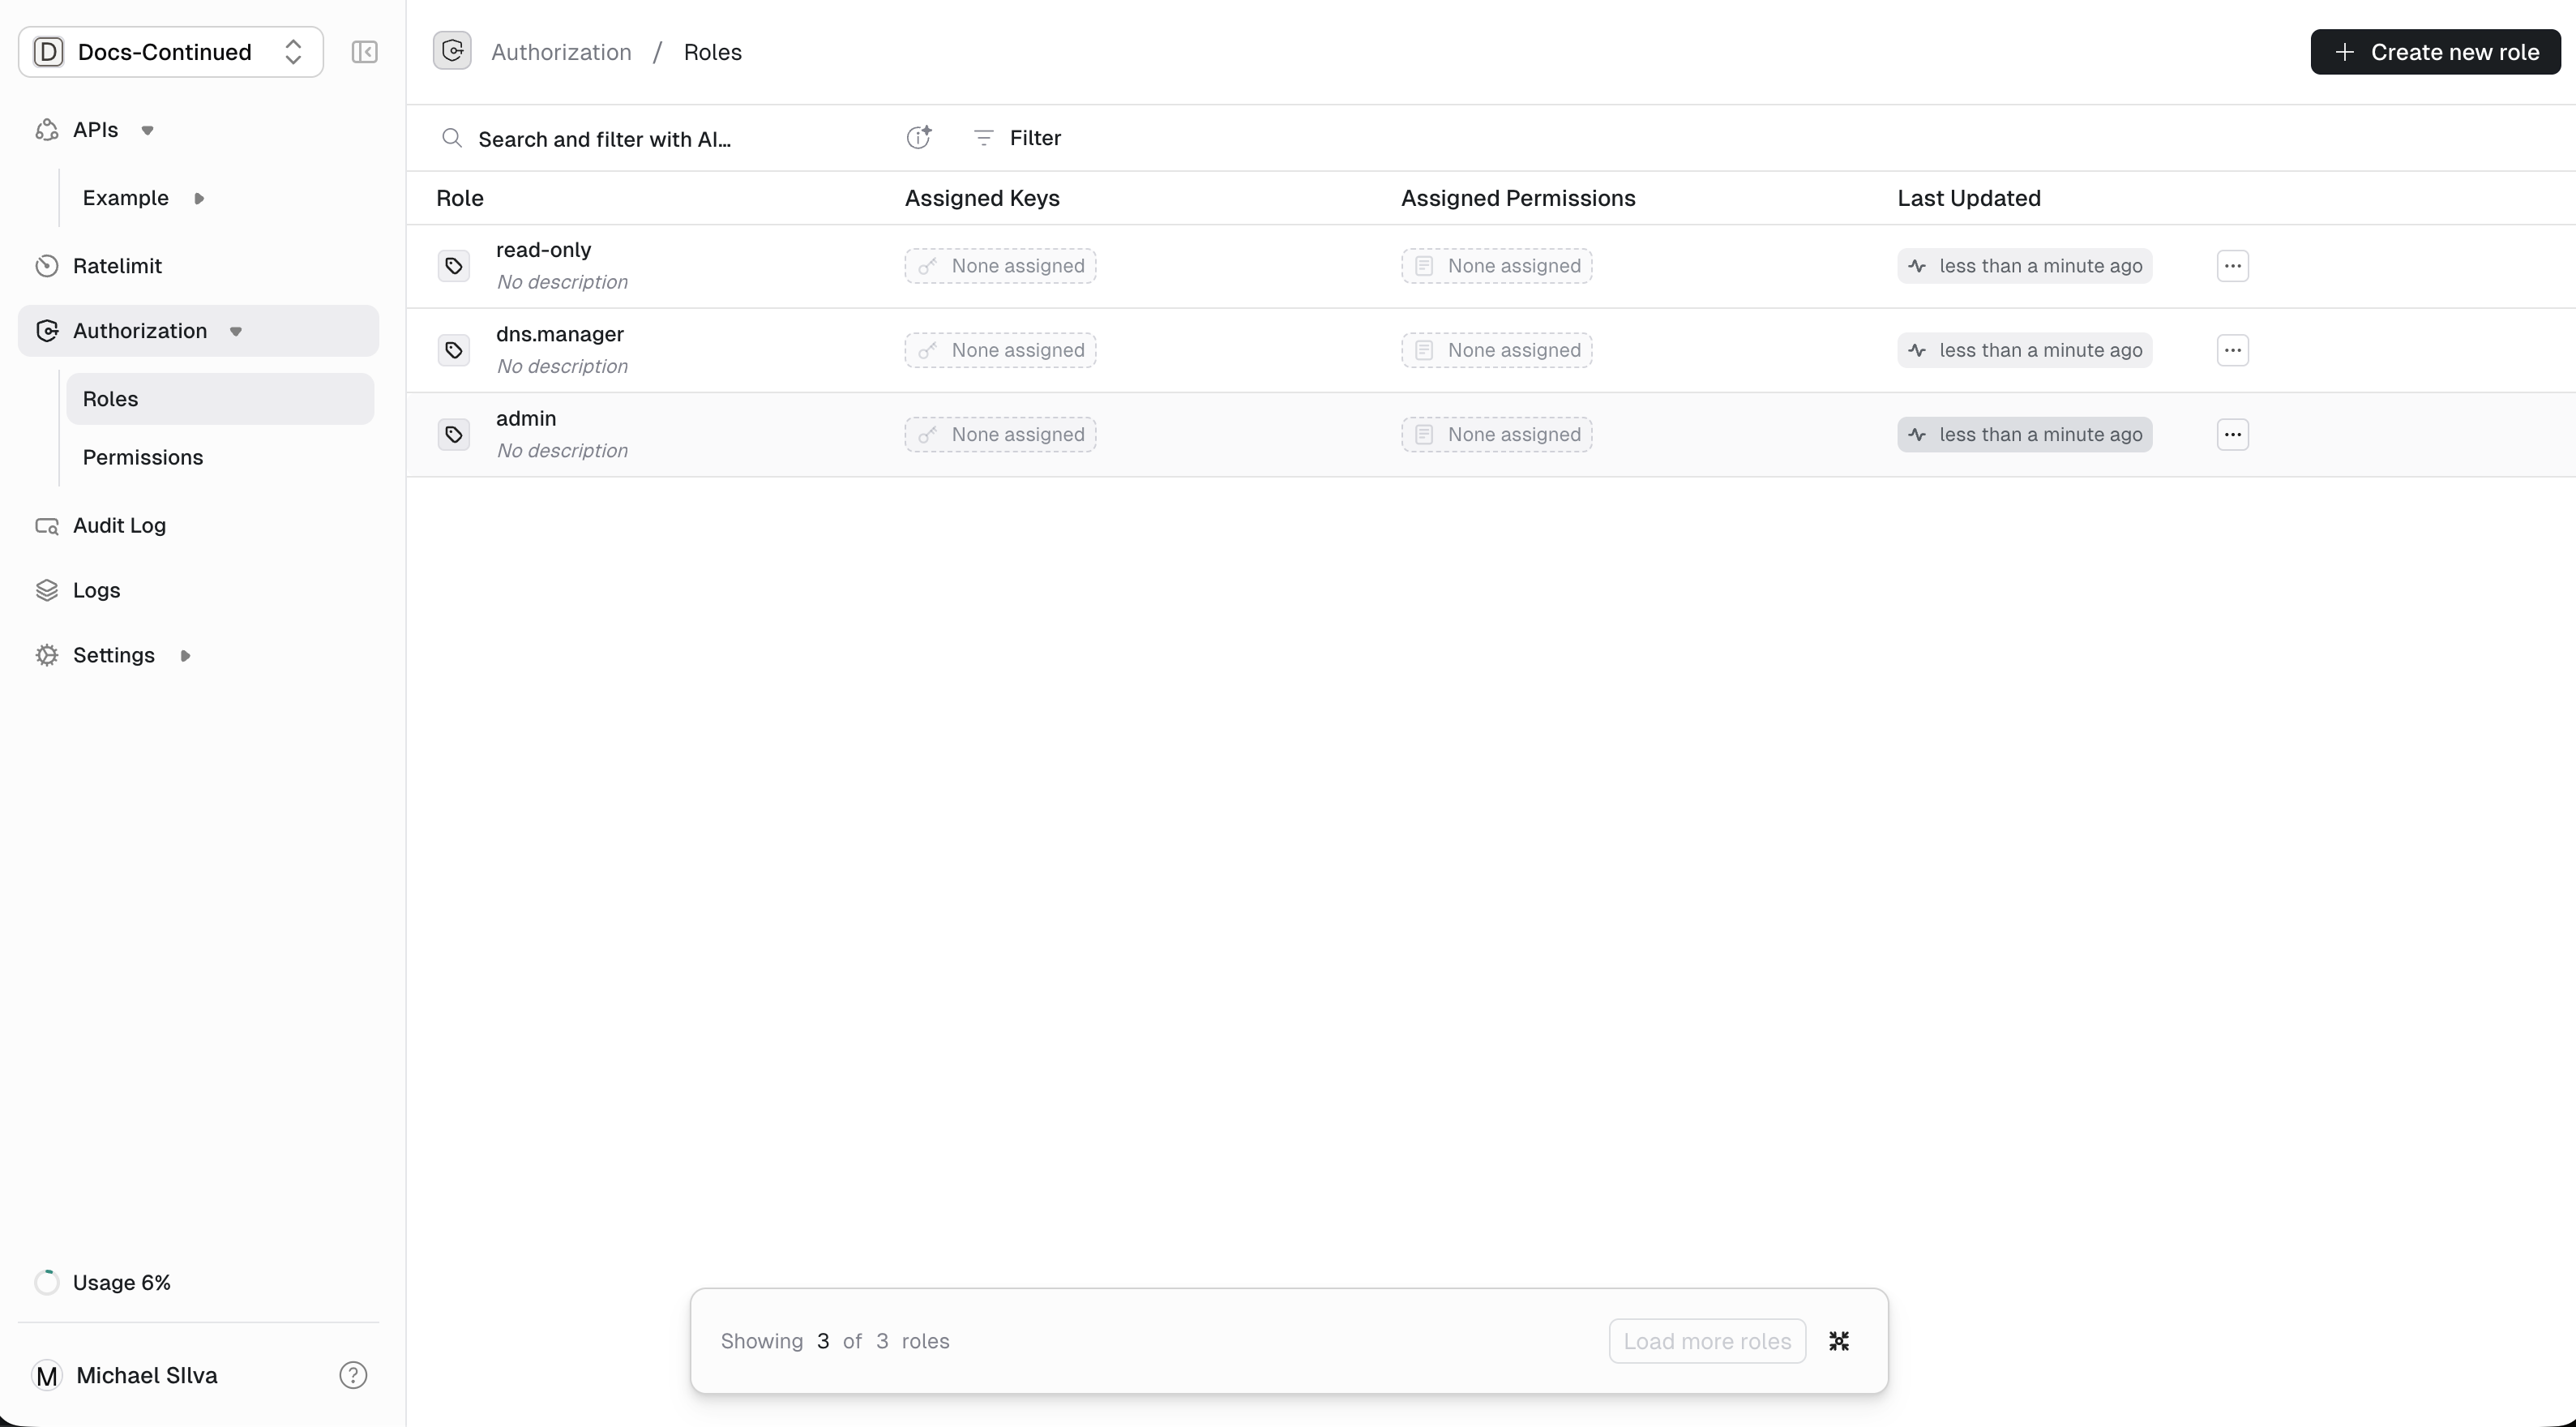
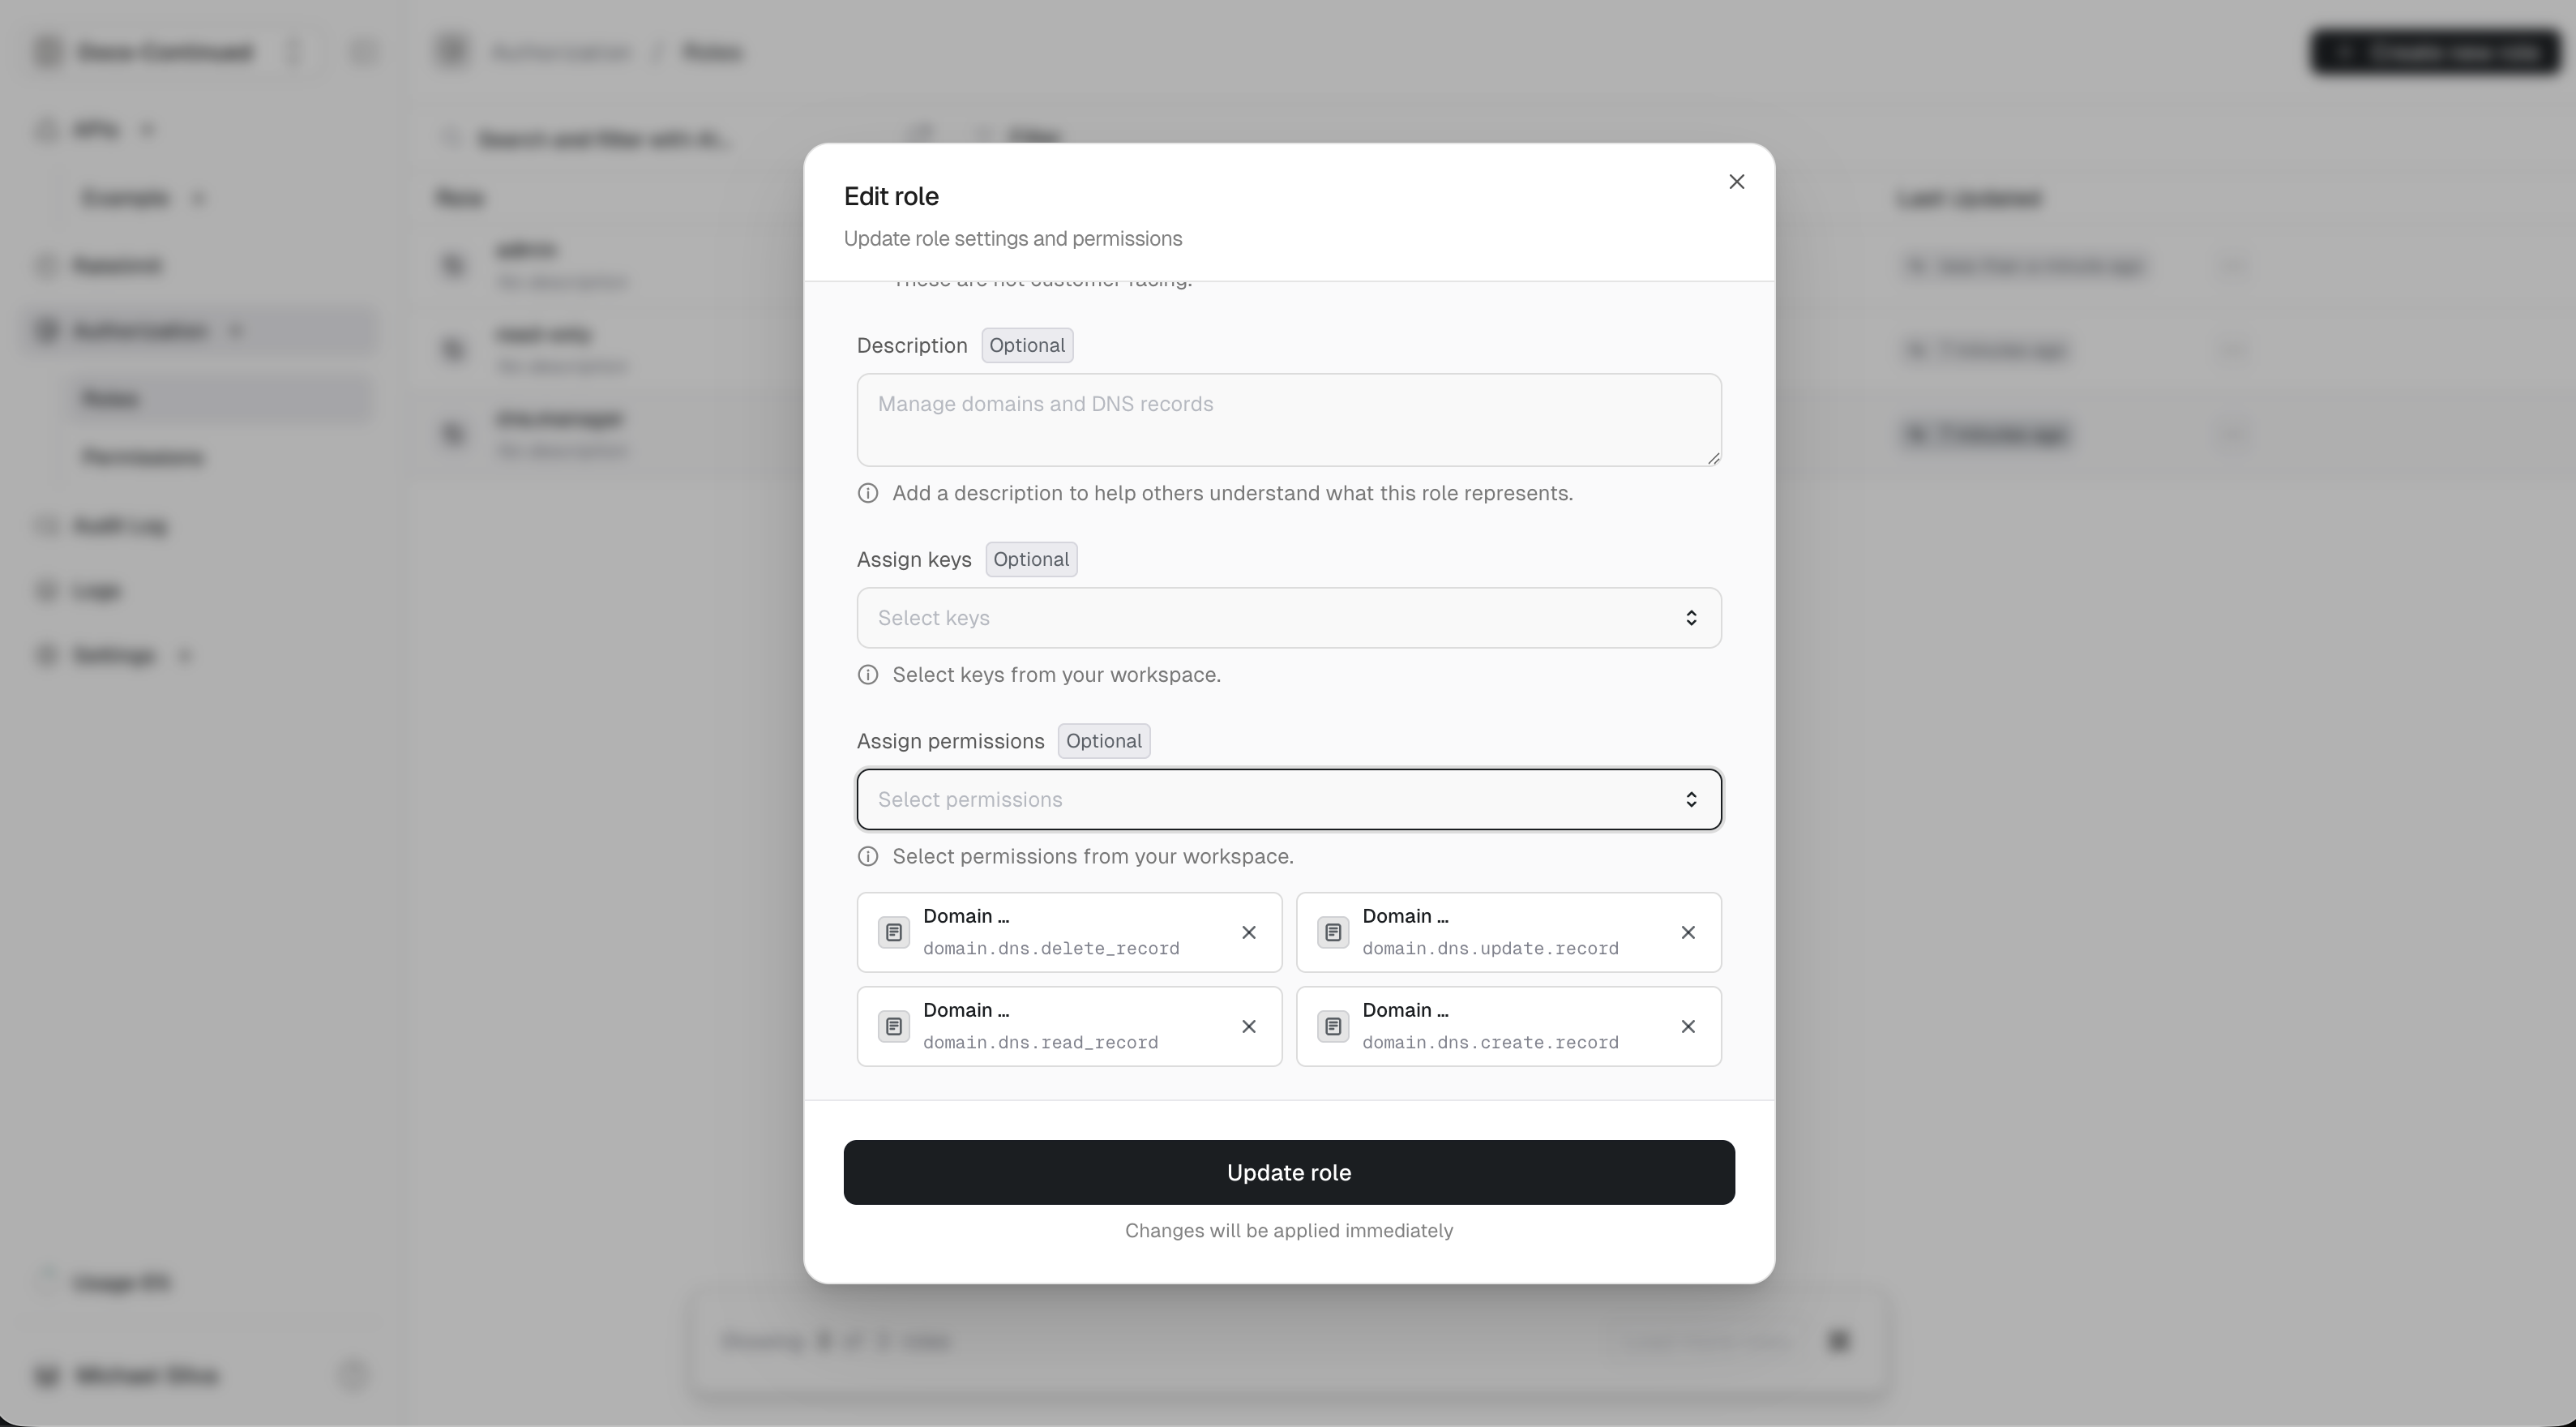
admin: An admin can do everything.dns.manager: Can create, read, update and delete dns records but not access the domain itself.read-only: Can read domain or dns record information.
Authorization/Roles page. Use the button in the upper right. + Create new roleConnecting
For each role, we need to connect the permissions it should have.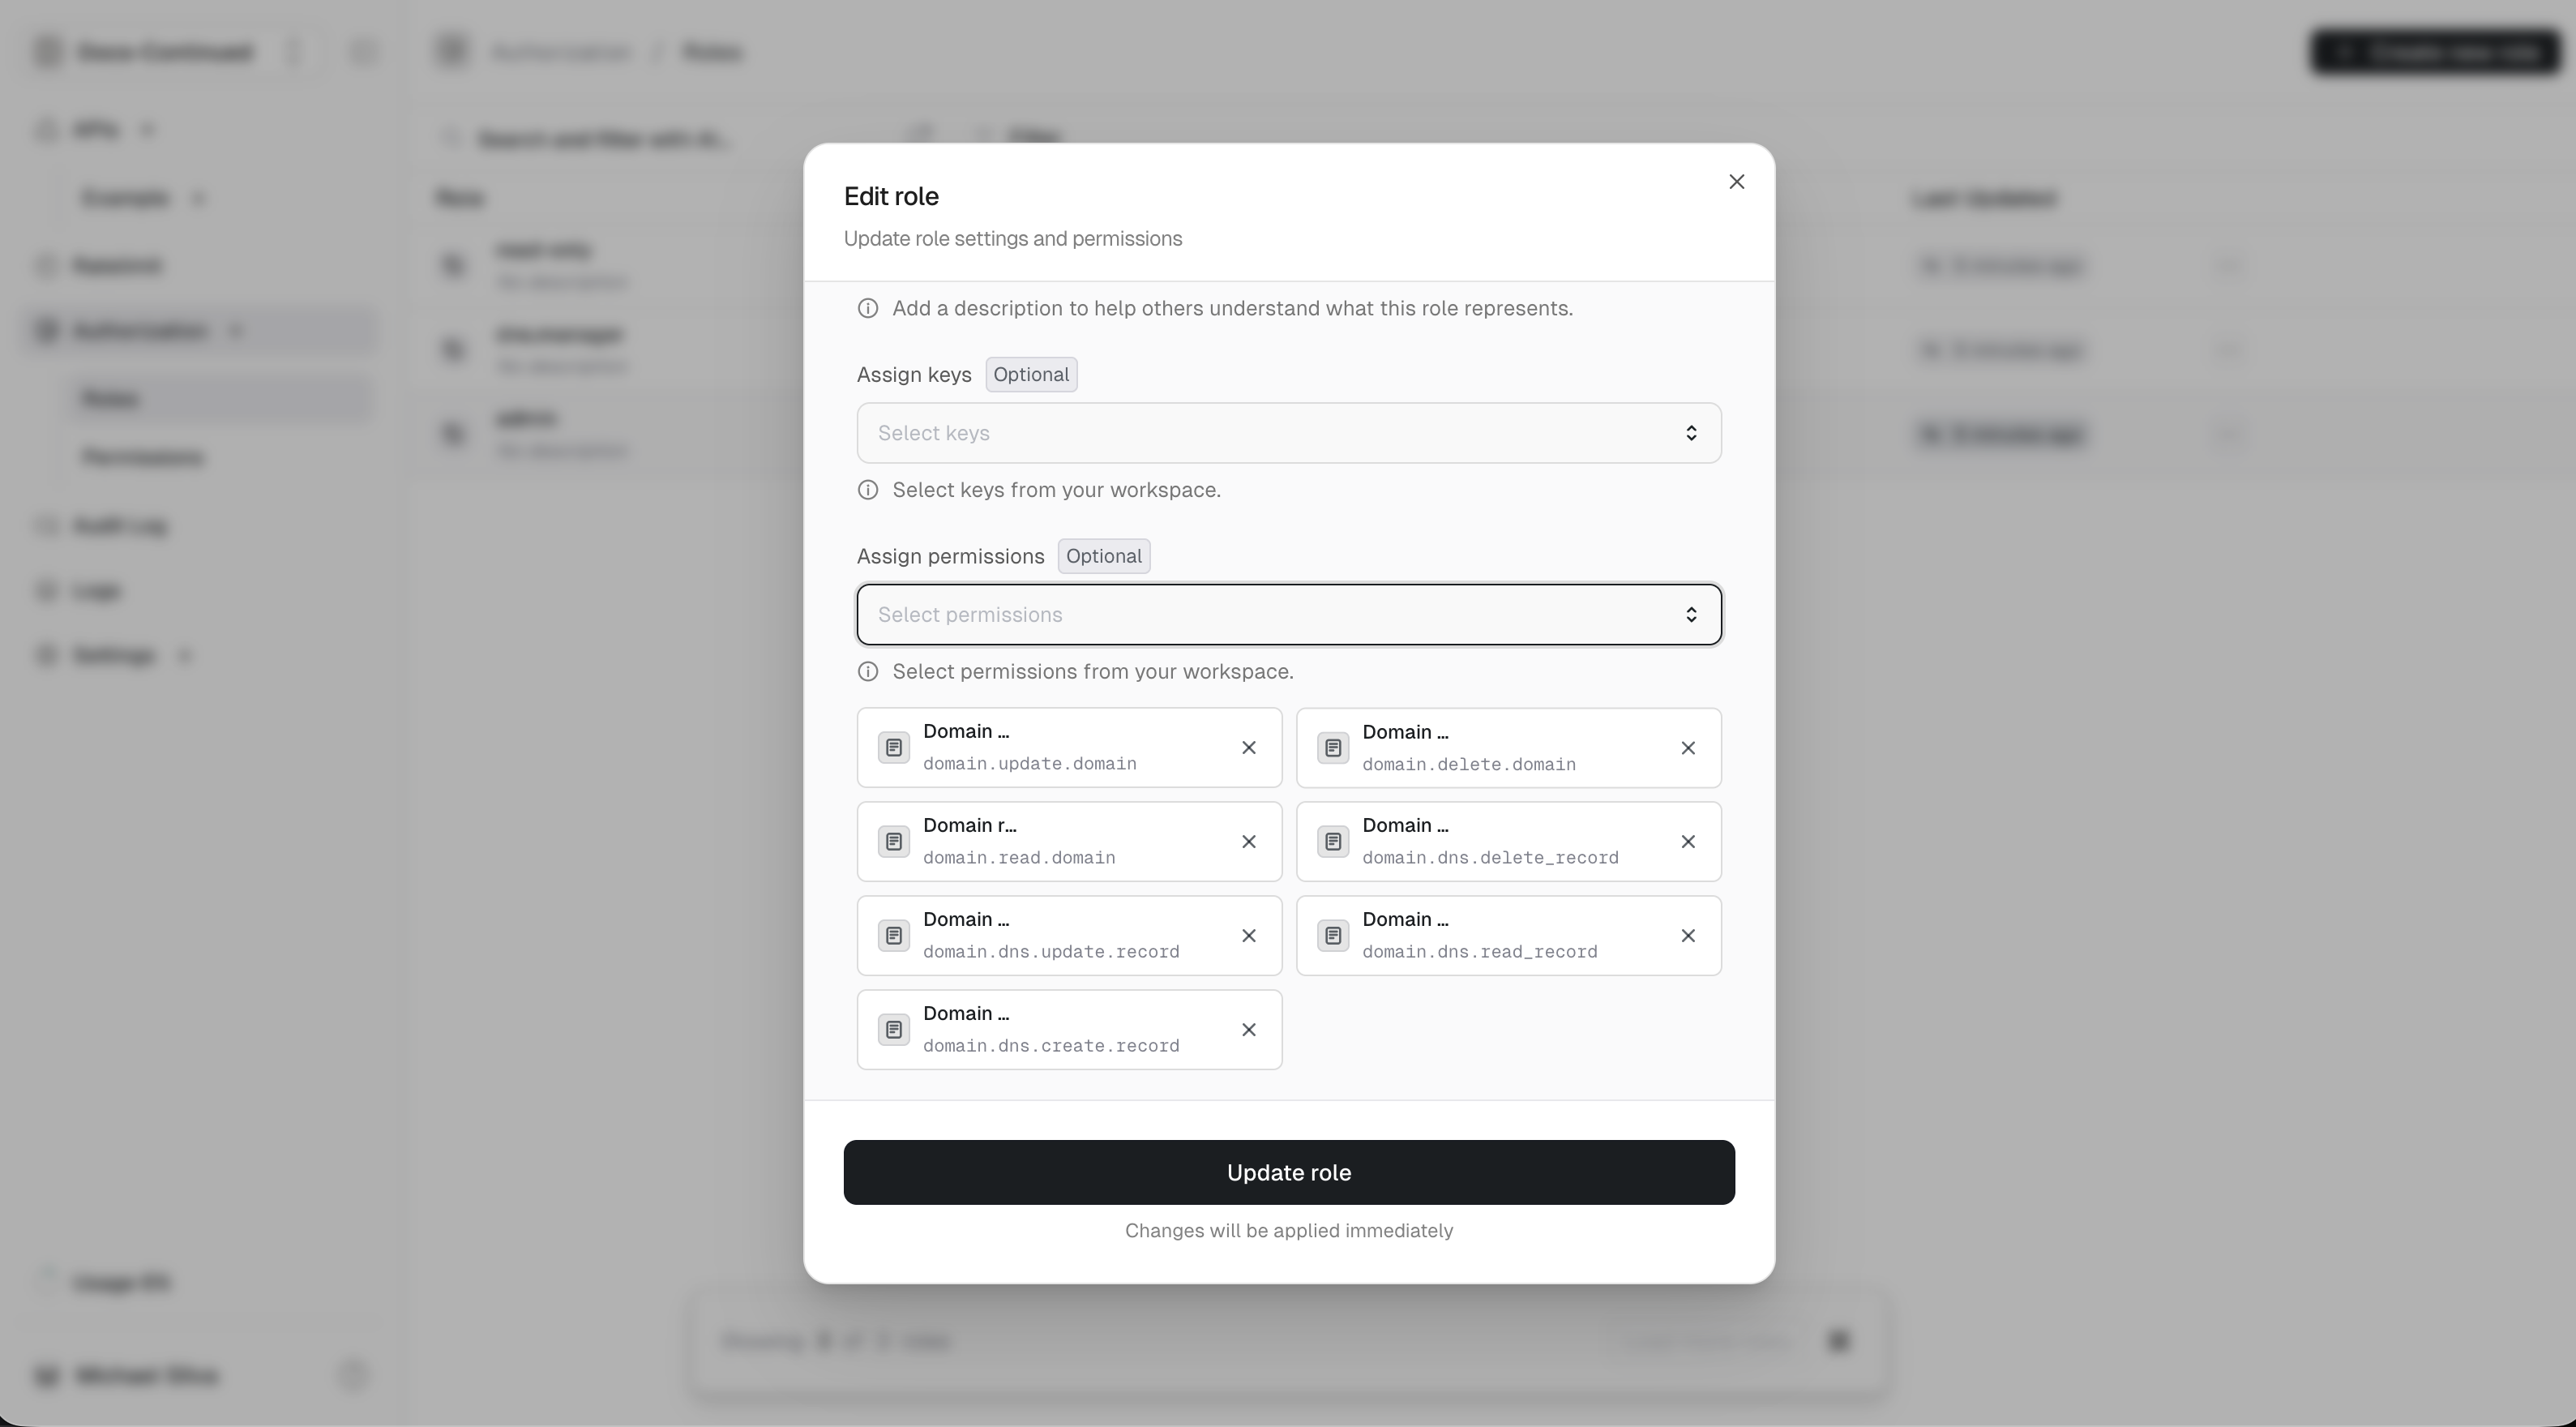
- admin
- dns.manager
- read-only
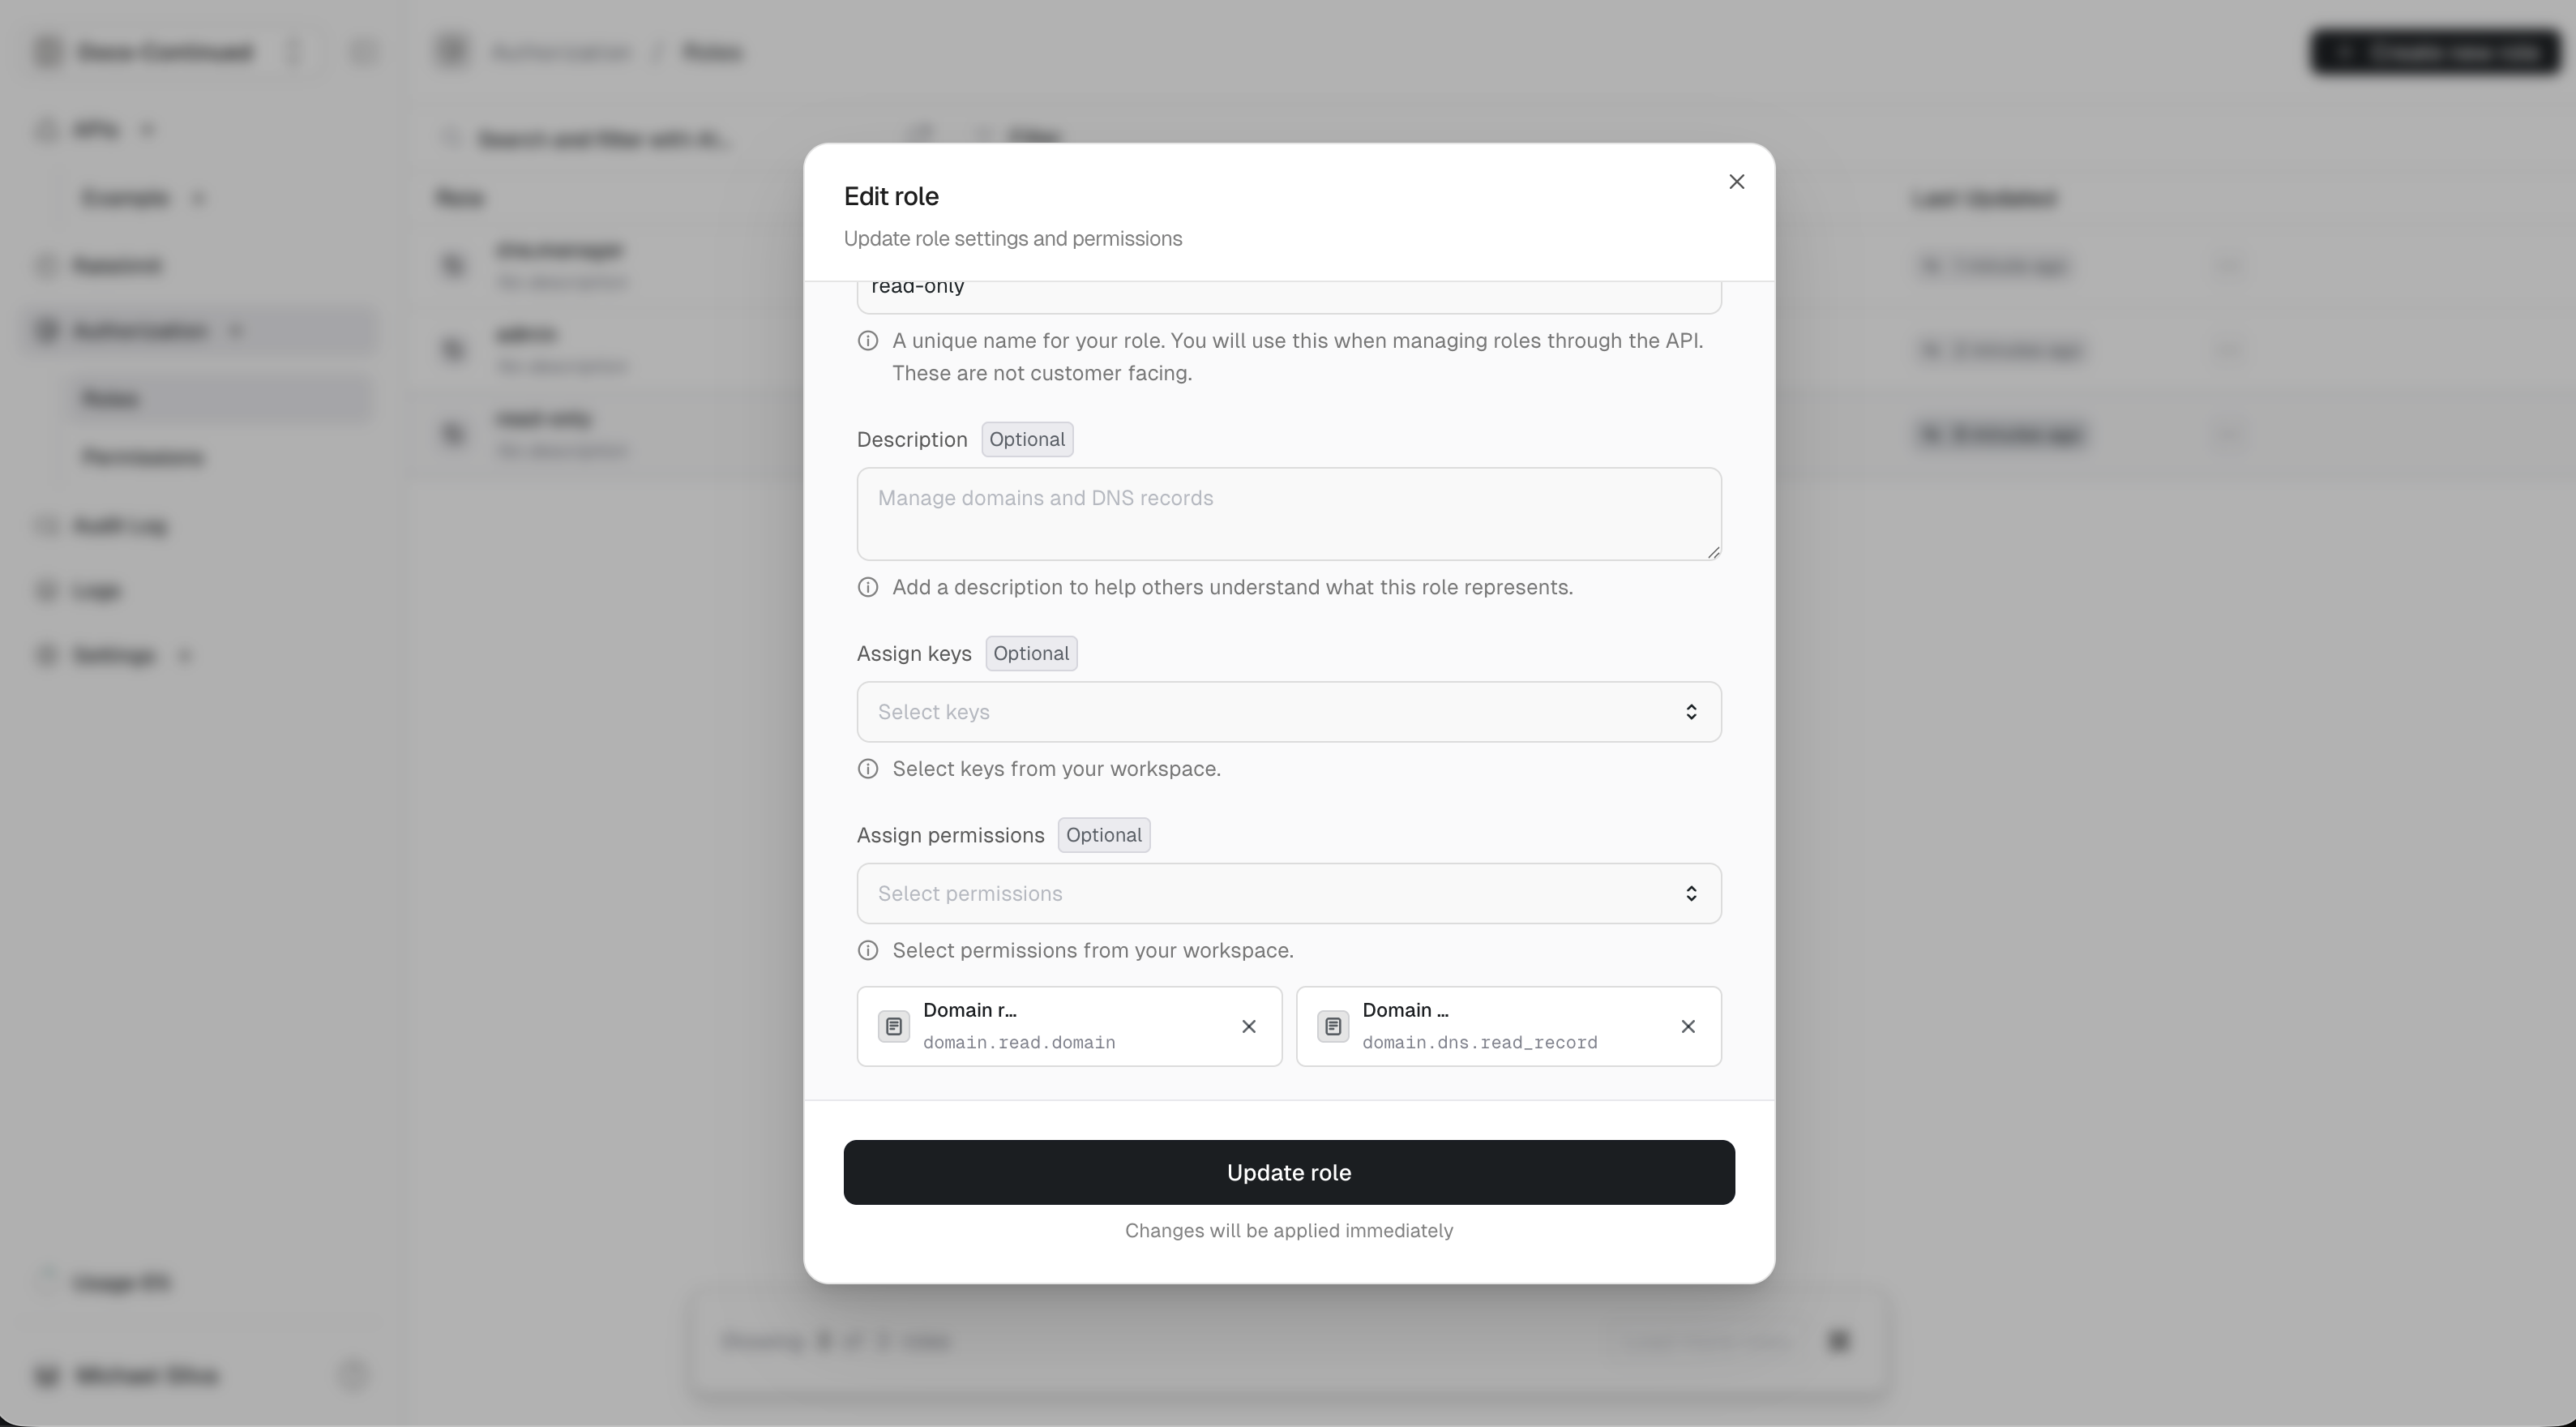
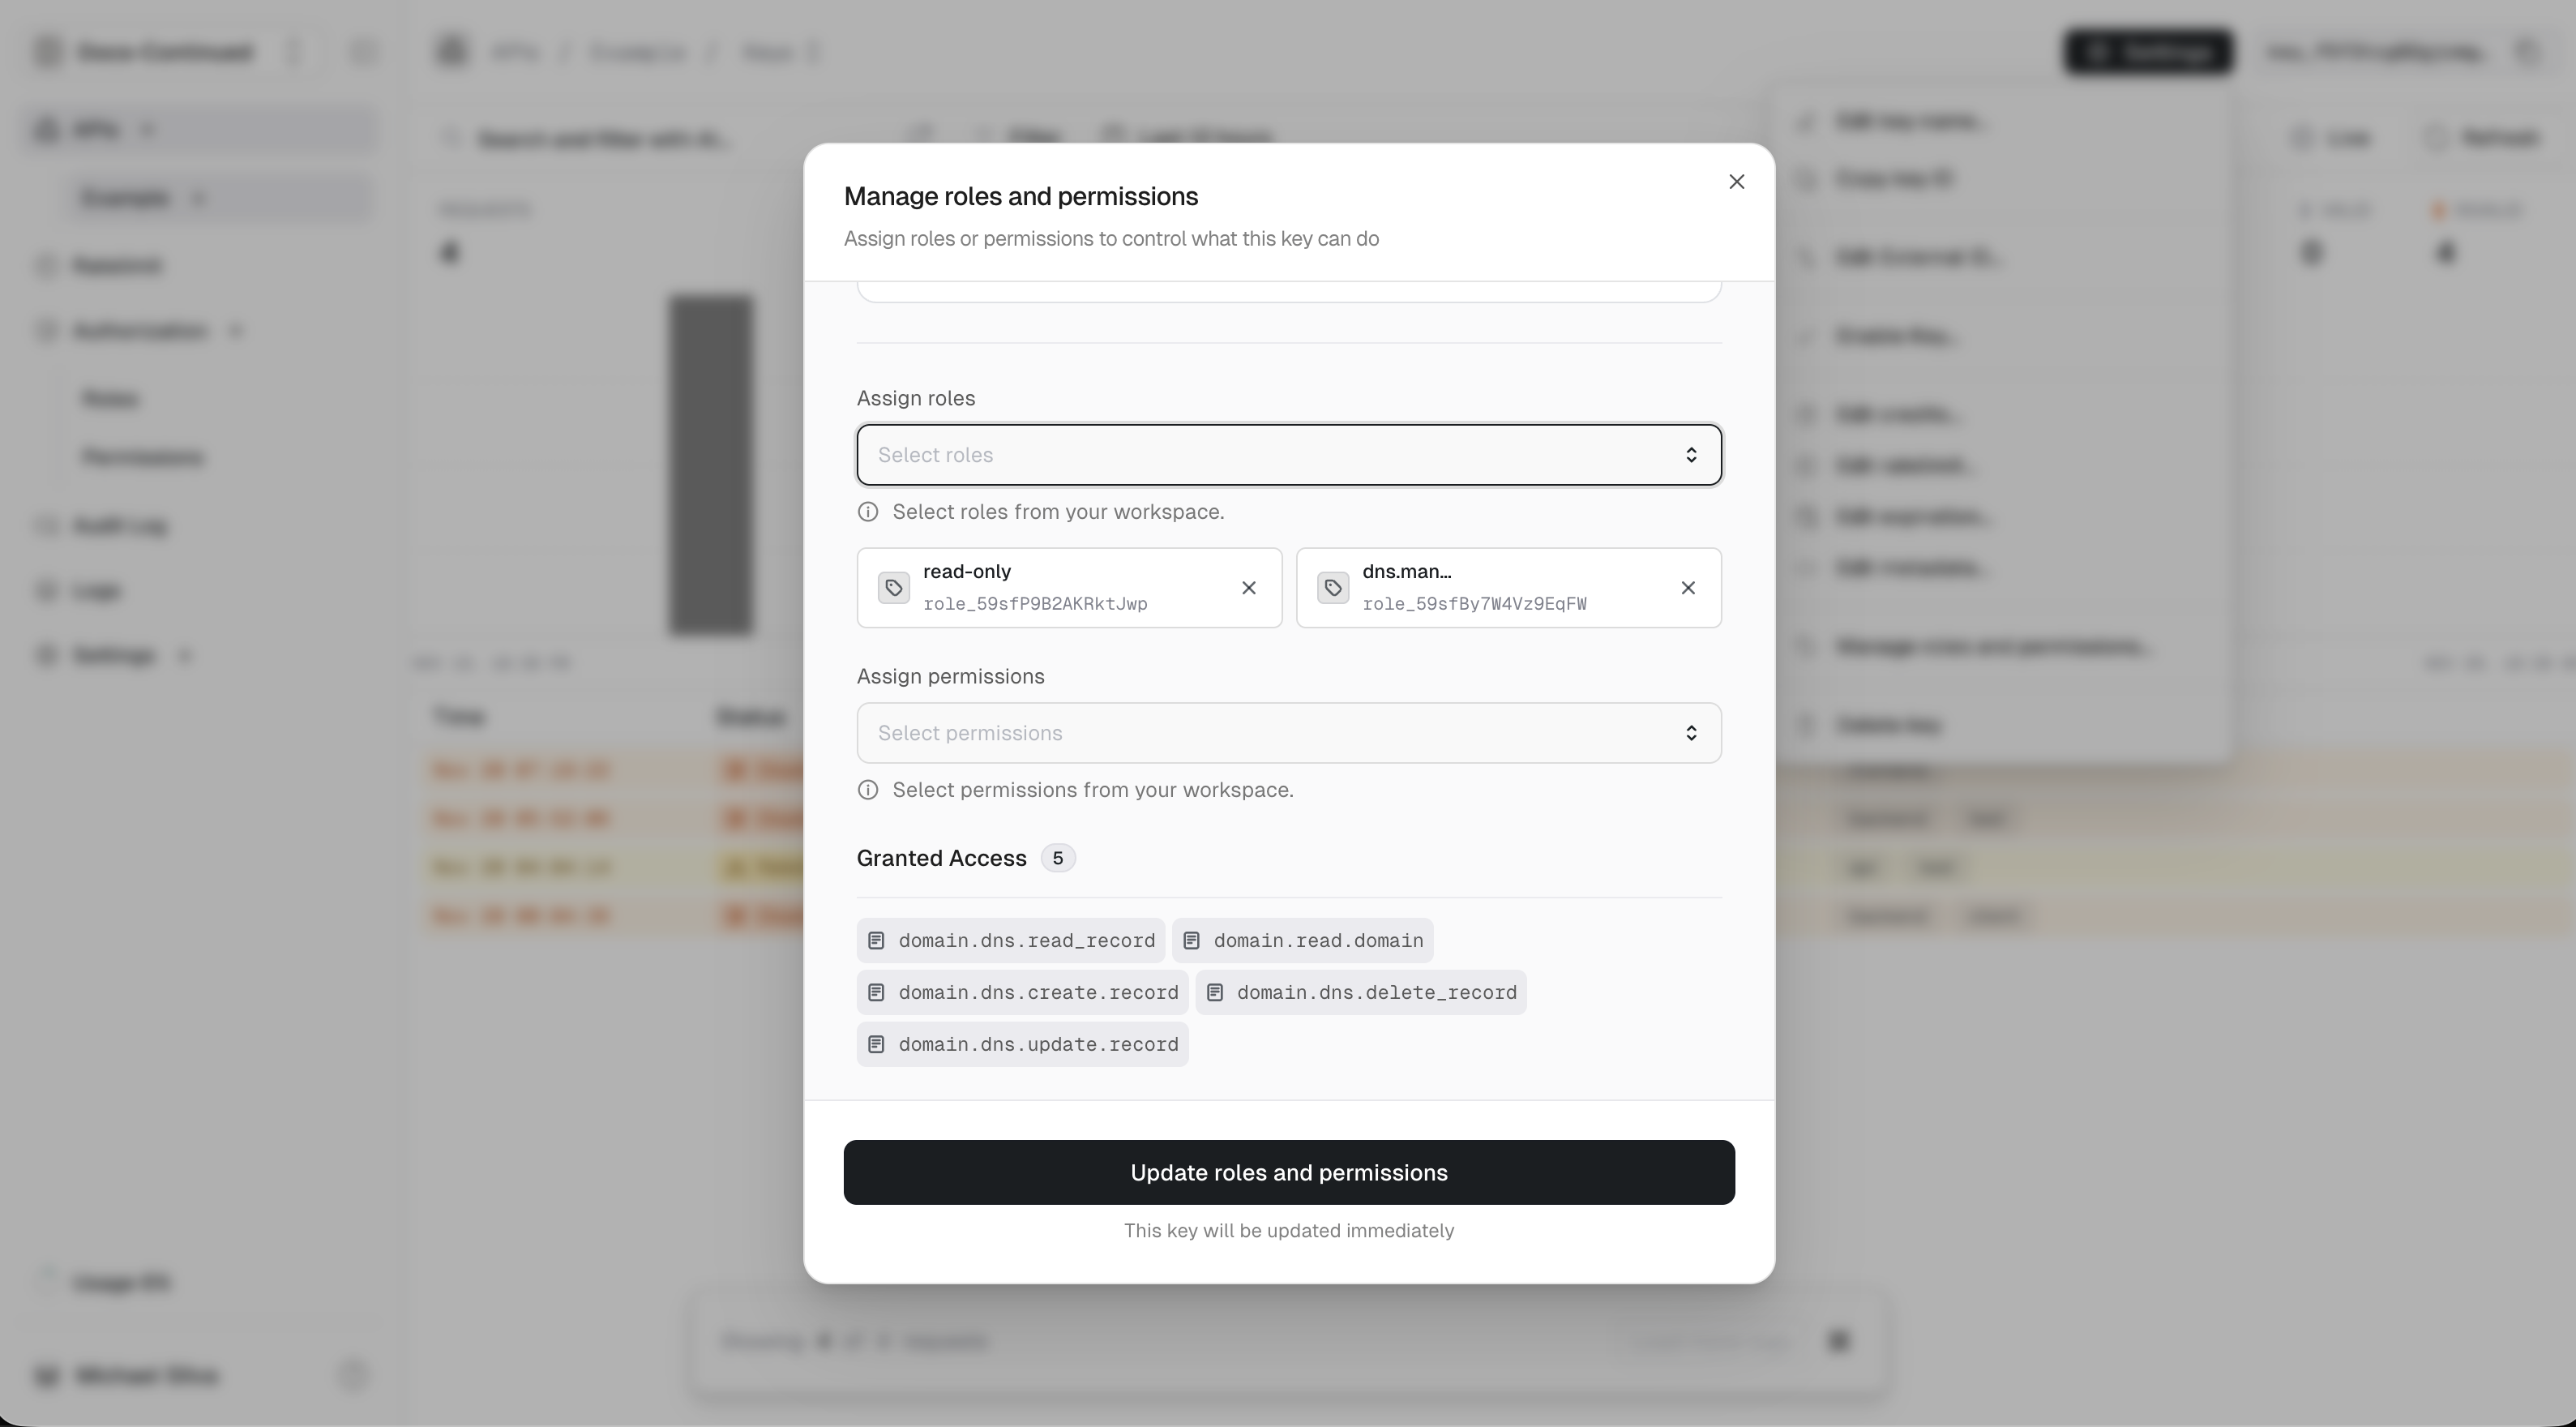
Connect a key
Now that we have permissions and roles in place, we can connect them to keys.
- Dashboard
- API
- In the sidebar, click on one of your APIs
-
Next click on keys in the expanded API you selected.
-
On the key you want to use, click on the action menu (
...) at the end of that table row. -
Select
Manage roles and permissions..
- You can connect a role to your key by using the
Assign roleinput. Let’s give this key thedns.managerandread-onlyroles.
roles and 5 permissions shown just above the Roles section:Verifying Permissions
Now you can verify this key and perform permission checks. Read more